What is Hydroseeding?

Share this article!
The Origin of Hydroseeding
Planting grass seed, or other types of ground-covering seeds, by hand can be a tedious process that’s prone to inconsistencies. In addition to being time consuming, planting grass seed by hand is also costly, because seeds are prone to blow away with winds, or wash easily away with rainfall and water runoff. This can lead to product losses and inconsistent, unattractive results which often results in the hand seeding process needing to be redone or revisited multiple times.
These were problems Charles Finn was keen on solving in the early 1930s, and his solution — the very first HydroSeeder —would revolutionize the industry and become the gold standard for everything from residential and commercial landscaping to large scale, industrial applications like freeways and bridges, stadiums, and golf courses.
Hydroseeding 101
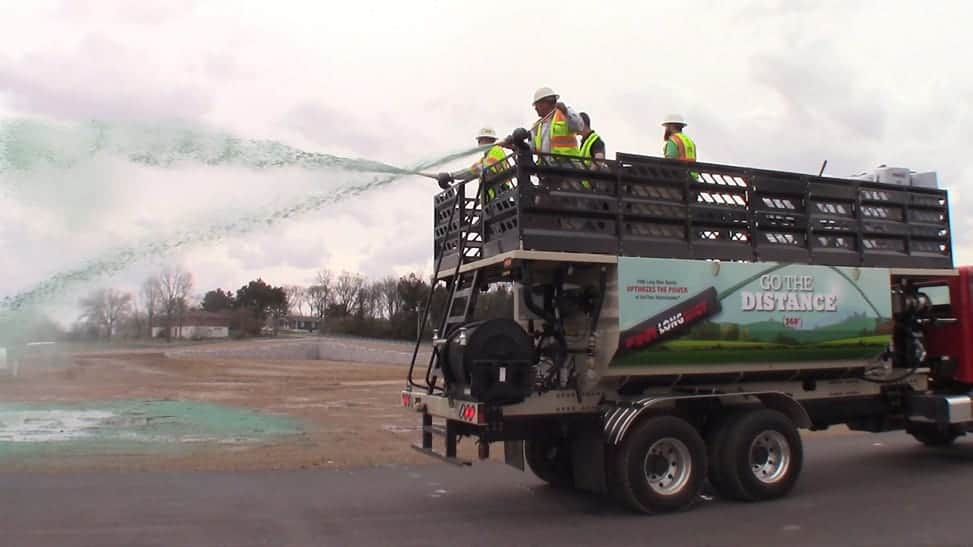
Hydroseeding is an efficient seed planting method that sprays a combination of seeds, mulch, water, fertilizer, and dye from tanks over large areas — preventing soil erosion while promoting the growth of grass or other varieties of seed crops.
In the early days of hydroseeding, Finn conceived a method to mix various kinds of seeds, in a ‘slurry’ that combined mulch, or ground up straw, fertilizer, water, and typically green dye to aid the application process. This slurry was then stored in large tanks and trucks where it was continually mixed through a mechanical paddle agitation process to maintain the right balance of materials while it traveled to job sites.
Once on site, hydroseeding trucks now use exclusive pump designs and powerful hydraulics to spray the slurry over the desired area. The green dye provides a guide to ensure slurry is evenly and precisely applied, and the mixture of mulch, fertilizer, and seeds helps prevent seed loss while encouraging healthy growth and protective soil bonding.
Once applied, hydroseeded areas can be expected to sprout within 1-2 weeks.
Pros and Cons of Hydroseeding
Hydroseeding, also called Hydromulching, can be an effective and efficient way to seed large areas and meet regulations for things like erosion control and soil degradation. As a result of its design and process, hydroseeding lends itself well to large-scale seeding needs, however there are situations when alternate methods of establishing grasses can be more effective than Hydroseeding.
| Pros: | Cons: |
| Seed establishes quickly | Hydroseeded areas require sometimes 2-3 times more water than sod |
| Generally more affordable than sod | Can be more costly for smaller projects/lawns |
| Flexibility to combine different types of grass varieties for a healthier lawn | |
| Can cover a large area quickly | |
| Uniform results | |
| Cost effective at scale |
Hydroseeding vs. Sod
When you have more money than patience, you may prefer to install sod rather than hydroseed a new lawn. Especially for smaller areas, there is a lot to be said for going from dirt to grass instantly! The drawbacks with sod are the expense, limitations on the grass variety, and establishing a deep, healthy root system quickly.
It’s not uncommon for sod to cost sometimes 3 times what Hydroseeding costs. With Hydroseeding, you can choose the exact species and blends of grass that you want for your lawn, and by planting seeds directly in the soil, rather than established grass, the root system of the grass grows deep, strong and healthy. To establish and maintain grass health, the soil needs to be properly prepared, fertilized, and amply watered.
Hydroseeding:
- More control over seed varieties
- Quick to apply
- Establishes a deep, healthy root system
Sod:
- Instant lawn – no seed germination wait time
- Generally expensive relative to hydroseeding or hand seeding
- Limitations on grass varieties
Hydroseeding vs. Seeding
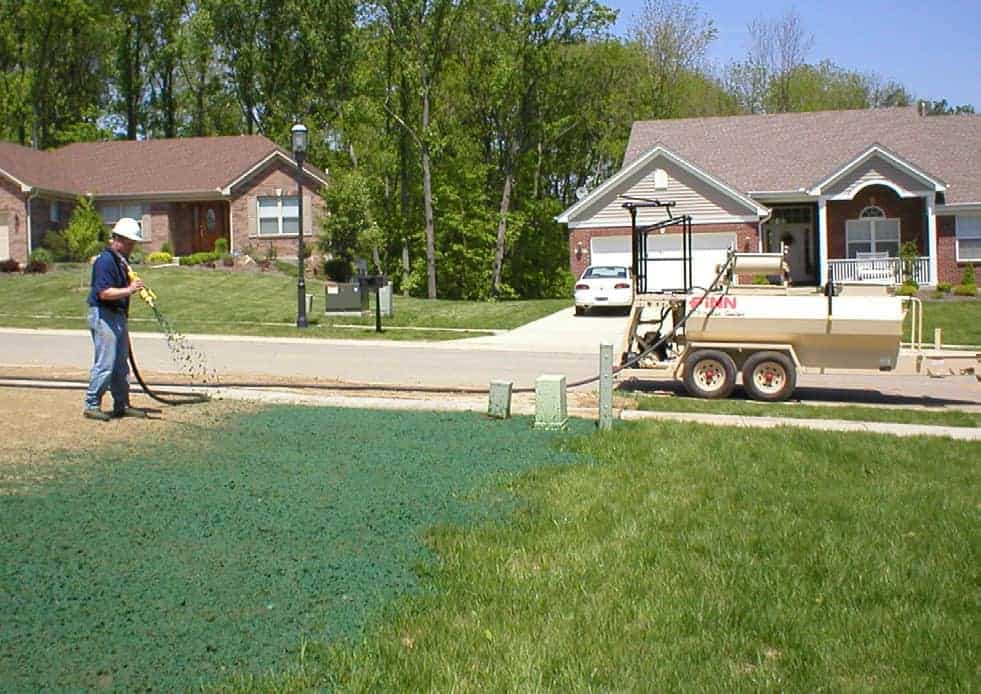
For smaller spaces, like some residential lawns, hand seeding or dry seeding can be an effective, albeit time consuming method to create a nice green lawn. Both these methods typically apply seeds, mulch, and fertilizer in separate steps, either via a hydraulic sprayer or by hand.
In hand seeding, the time and resources it takes to cover the entire space can be extensive, and the results can be uneven, and sometimes inconsistent.
With hydroseeding, all the materials are applied simultaneously — creating a uniform application that cuts down the application time of traditional seeding.
Hydroseeding Cost
While the costs of sod, seed, and Hydroseeding vary by region, vendor, and a variety of other factors, generally planting seed alone is the cheapest method because it eliminates the need for Hydroseeding equipment and extensive labor of sod.
Hydroseeding typically places second as far as pricing, and will generally cost about twice the price of seeding alone. Sod generally runs about 2-3 times the cost of Hydroseeding — making it the most expensive option of the three.
On average, you can expect the pricing for different types of lawn to break down something like this:
| Seeding | $0.02 per square foot, or $680-$1050 per acre |
| Hydroseeding | $0.05 to $0.20 per square foot, or $2,000 to $4,000 per acre |
| Sod | $0.30 to $0.83 per square foot or roughly $13,068 to $36,154 per acre |
Keep in mind that these are very general, and depending on your area, costs can vary wildly. For example, in different markets and regions, costs for different types of seeds vary, as well as labor, and the cost to rent hydroseeding equipment can also vary. It’s best to inquire with local hydroseeding companies if you are considering a lawn installation project.
DIY Hydroseeding
While there are many considerations that come with hydroseeding — mainly, doing the job right — it’s not rocket science. If you’re handy and want to invest the time, it’s very possible to do a small job, like a typical yard, yourself.
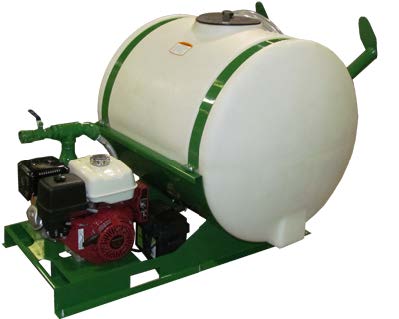
Many FINN Hydroseeder dealers rent equipment and you can likely find rental stores that carry hydroseeders. For a few hundred dollars a day, you can get a 300- or 600-gallon hydroseeder and do the job yourself.
If you are going the DIY hydroseeding route however, it’s important to take the time to learn how to do it correctly for the best results. This article is not intended to be a detailed “How To” manual for installation, but rather an introduction to the steps involved so you can make the right decision about undertaking DIY hydroseeding, or hiring an expert to do it for you.
How to Hydroseed Yourself
- Step 1: Test your soil. Get soil samples from your yard so you can test your soil’s Ph levels. The experts at Pennington Seed state that, “Soil pH preferences vary between regional lawn grasses, but most grasses prefer soil pH between 5.8 and 7.2. Warm-season grasses tolerate slightly lower pH, while cool-season grasses prefer pH slightly higher.” A simple Google search for “soil testing near me” will help you find local resources that explain how to test your soil and where to send your samples. Budget a couple of weeks for this and a $25-$50 fee.
- Step 2: Measure your lawn. You’ll need to know how large your yard is in square footage so you can plan enough seed and additives to establish the lawn.
- Step 3: Prepare your soil. To be ready for hydroseeding, soil needs to be smooth and de-compacted to at least 3 inches.
- Step 4: Purchase Your Consumable Hydroseeding Supplies. It’s best not to skimp here — use the recommended quantities. In order to do that:
- A. Find a local source with experience with Hydroseeding, like a nearby Finn Dealer. They can help advise on what materials, and how much, you’ll need based on the size of your yard.
- B. Select the seed type you want for your lawn — you’ll have some choices for seed types or blends that grow well in your area. Again, a local Finn professional can help you determine what seeds or mix of seeds will work best for your particular lawn.
- C. Select the fertilizer that blends well in the hydroseeder you’ve chosen, and is designed for new lawns.
- D. Select any additives needed to get the soil Ph to the right levels based on your soil test. It’s best to have a professional opinion on this step as well.
- Step 5: Rent the hydroseeder. Most commercial grade hydroseeders use mechanical agitation to mix your slurry — this is widely accepted as the best method to mix. Some rental agencies may offer equipment with “jet agitation” which will work for smaller tanks, but mechanical agitation tends to mix the slurry more thoroughly, especially in larger tanks.
- Step 6: Get equipment and consumables to your job site and mix it up. Follow the instructions provided with the equipment to mix correctly — just don’t skimp on quantities of components. Make sure you mix it thoroughly and that you have the right consistency — not too thin or thick. Ask the supplier about the right slurry consistency for the products you have selected.
- Step 7: Be thorough and precise. This isn’t the place to short consumables or try to move quickly. Whether spraying from a hose or a boom, be sure to cover the ground thoroughly. Complete covering is essential to establishing a healthy lawn. You’ve already spent some money on this job, and cutting corners at the last minute to try to save can end up costing you more in the long run — the entire application may fail. The best advice is to do it thoroughly and to do it right the first time.
- Step 8: Clean and return equipment. Once you’ve finished, you can return clean equipment to the rental agency. You may also be able to return any unopened bags of consumables.
- Step 9: Maintain your lawn. Keep the lawn watered according to the label instructions on the consumables and watch your new lawn grow! You will probably be cutting grass in 3-6 weeks, depending on the seed selection and growing conditions.
Different Types of Hydroseeding
Different hydroseeding material types can be used for different applications, and are each are suited to unique kinds of projects, whether that’s hydroseeding, hydromulching, ADC application, and more:
Straw, Paper, Wood Fiber and Combination Mulches
These are the most common types of mulches to hydroseed or hydromulch with, as they provide erosion control while supporting effective seed growth. Each of these contain different ratios of mulch to seed, and some include additives like tackifiers (sticky chemicals) to help the mulch stay in place and establish seed amid the elements.
Paper mulch is typically made from recycled newspaper and is less expensive than other mulches. It is very easy to spray for all hydroseeders including jet agitation machines. It must be kept wet or it will “paper mache’” and become difficult for grass to pass through as it grows. It is more vulnerable to erosion than straw or wood fiber mulches since it is much lighter.
Wood and wood fiber mulches provide better moisture retention, and are less vulnerable to erosion than paper. These mulches create a strong matrix when mixed with tackifiers and sprayed at the proper rate.
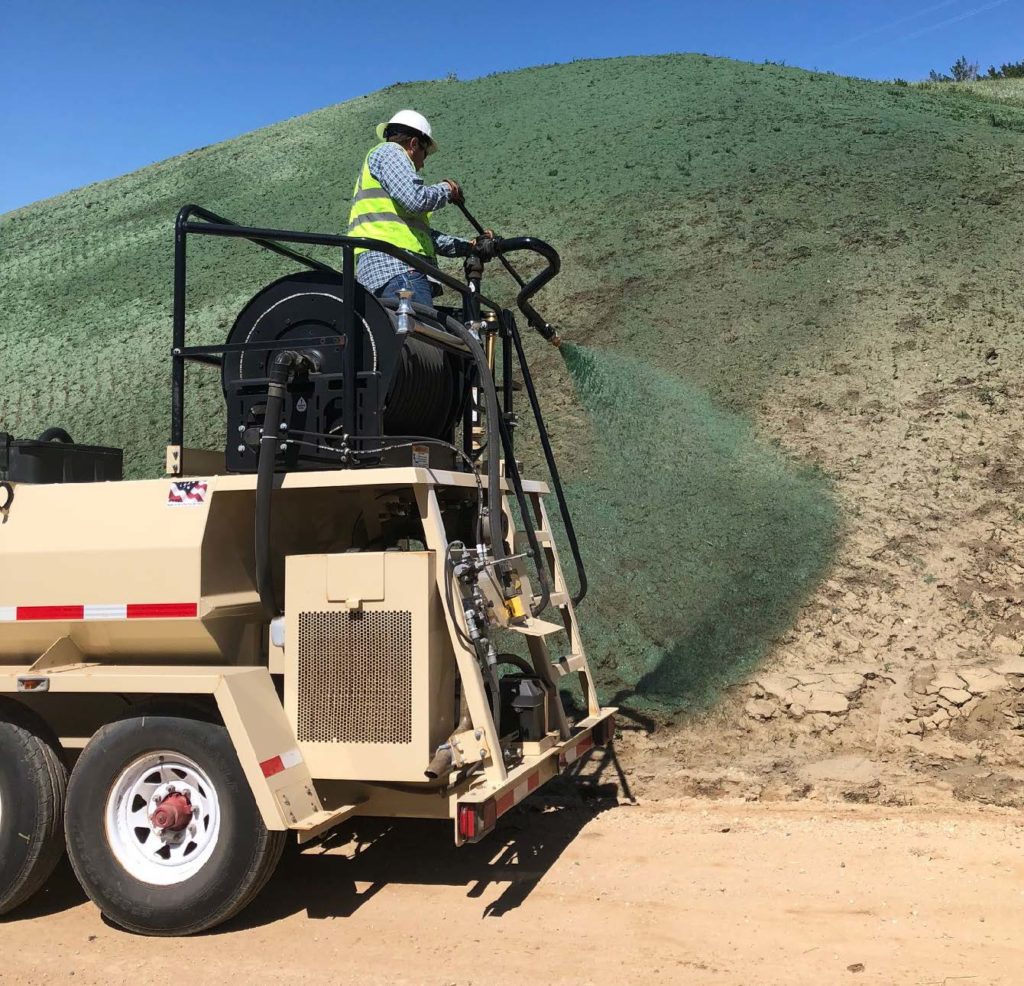
Erosion Control Mulch/Bonded Fiber Matrix (BFM Mulches)
These types of hydroseeding are high performance products typically used in steeply-sloped areas, like creek or riverbeds, where erosion is likely to impede seed establishment. Engineered with a water-resistant bonding agent, this hydromulching process essentially sprays on blankets that form a tight matrix to provide the highest level of erosion control available — as such, BFM hydromulching tends to be more expensive than other types of hydroseeding.
BFM mulches are also thicker when mixed, so it takes very thorough mixing to achieve the right consistency. As a result, these are generally used by major players in the Hydroseeding industry using the largest tanks and completing the biggest jobs.
Topsoil Alternatives
Topsoil alternatives are a type of hydroseeding used on soils and substrates that have been stripped of their nutrients from construction and other land-disturbing activities. It can be very expensive to bring topsoil into large areas to give new grass seed a chance to thrive, but hydroseeding can provide a relatively affordable option.
These topsoil alternatives are sprayed with a hydroseeder and provide a good substitute to allow seed to germinate and thrive. For a more detailed look, check out Profile Products’ “ProGanics Biotic Soil Media (BSM)’.
Alternative Daily Covers
Hydroseeders can be effectively used in landfills to apply alternative daily covers (ADC) – these refer to materials other than soil or earthen materials that are used in landfills to help control landfill odor, dust, and erosion.
Types of Hydroseeding Equipment
Hydroseeders come in all shapes and sizes, and are suited for a variety of jobs. Here, we’ll provide an overview of the key differences between products and some of the features and benefits of different components of hydroseeding equipment.
Hydroseed Jet or Mechanical Agitation
This is a debate that can start some fights among industry professionals. Maybe not Ford vs. Chevy level dragouts, but commercial Hydroseeding professionals definitely have their preferences. In general, jet-agitated equipment is used more commonly for residential and light commercial applications, while mechanical agitation is used for both small and larger jobs.
Jet Agitation for Hydroseeding
The advantages of jet agitation are that it is less expensive and generally works well with smaller tanks and applications — making it ideal for residential and light commercial work. For example, if you are a landscaper hired to plant the “islands” in a retail parking lot, jet agitation equipment would be ideal. Jet application machines also deal well with lighter, paper based mulches, however, some can handle heavier mulches as well.
Mechanical Agitation for Hydroseeding
By comparison, mechanical agitation typically mixes faster and more thoroughly for larger equipment, and can process heavier mulch products. If you are hired to plant seven acres around a new hospital complex, for example, you would want larger, beefier equipment that can plant a half acre, or more, on each load and mix your slurry very quickly — something mechanical agitation is particularly well suited for.
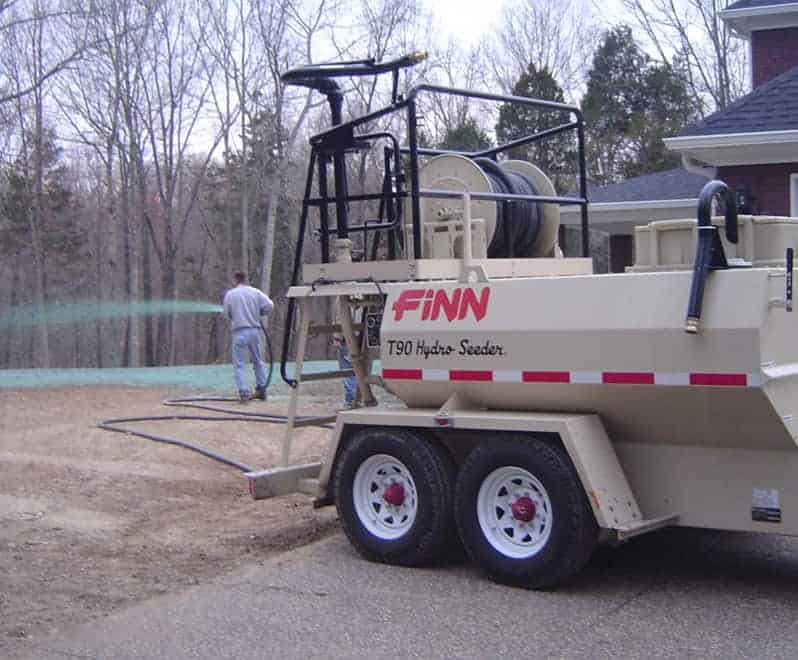
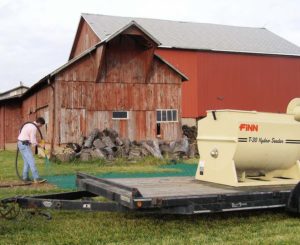
Hydroseeder Sizes & Types
Hydroseeders sizes range from 100 to 5,000 gallons. Hydromulch may even be applied by helicopters or planes, depending on the available access points to the jobsite. Hydroseeders are available on skids for installing on a truck bed, chassis, or even a tractor. Trailer versions are designed to be towed by trucks and tractors for large job sites as well.
Hydroseed Pump Technology
Hydroseeders have different pump technologies available — the most common being centrifugal and vortex. Agitators and pumps may be driven by mechanical or hydraulic means.
Hydraulic systems don’t require a clutch or belt, which reduces potential mechanical failure points. They do require additional hoses and valves, however, that offer their own challenges.
Hydroseed Spray Methods
Hydroseed spraying is achieved through either a boom or hose system. The largest hydroseeding equipment can spray nearly 370 feet through its boom, allowing access to areas that otherwise would be difficult to reach by truck or hose. Hose comes in many sizes and lengths, allowing for precise application and for distances up to 300’ or more from the truck.
When is the Best Time for Hydroseeding?
The best time to hydroseed is generally in the fall or spring, though this depends heavily on your local climate. Ideally, hydroseeding should occur when it is cool but not cold, and when a reasonable amount of rainfall is expected. (The rain will help defray the costs of watering.)
Fall Hydroseeding
Hydroseeding in early fall gives the lawn time to establish before winter sets in. The lawn will go dormant during the colder months and then have the rain and cooler temperatures of spring to give it a good start before a hot summer may threaten to dry it out.
Spring Hydroseeding
Hydroseeding in early spring is also acceptable, as spring’s typical rains and cooler temperatures make for optimal growing conditions. The disadvantage of spring hydroseeding however, is that when followed by a hot summer, grasses and lawns may take more watering the first year to keep it alive and thriving in the hotter summer months.
Finally, unless you have an abundant and cheap source of water, it’s best not to plant in the summer. There is not much point in fighting off high temperatures and dry spells if it’s possible to avoid it.
Hydroseeding and Erosion Control
There is much more to hydroseeding than simply slopping some seed and mulch on the ground and hoping it will grow! Hydroseeding has developed into a sophisticated process that is critical to the environment after construction, and especially following large projects such as roads, bridges, and mining operations.
Hydroseeding is one of the most-used techniques for preserving river banks to prevent runoff from entering our waterways. It is also used extensively for mine reclamation to return large, industrial mining sites back to their natural state after the mine is closed.
In fact, just about any place you see large amounts of ground disturbed for the purposes of building or transportation, you will find hydroseeders on the scene when the work is done to restore the ground and keep the soil from eroding away due to wind and rain. Hydroseeding is even common in creating recreational areas like parks and golf courses.
Hydroseeding has proven cost effective and fast —making it the go-to method in many commercial and residential applications.
To learn more about hydroseeding, contact us, a local Finn dealer, or explore these resources for more on the basics of hydroseeding:
Folow Finn Corporation on Social

How to Lay Mulch Evenly – When & Why to Use a Mulch Blower
Understanding the best way to spread mulch evenly can mean the difference between a great-looking, environmentally-friendly landscape, and one that falls short in both areas. From spreading mulch basics to how to spread mulch evenly, and when to use a mulch blower to achieve the desired results, these landscaper insider tips can help elevate your next project’s aesthetics and help…
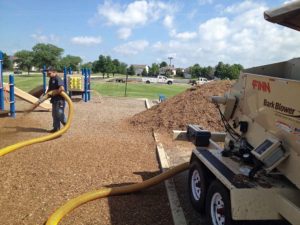
Bark & Mulch Blowing 101
One of the best ways to enhance soil composition, prevent erosion, and improve the aesthetics of any landscaping project is to utilize bark and mulch blowing. For our purposes, bark and mulch blowing are effectively the same thing, and can generally be used interchangeably. Bark and mulch are both great choices to prevent weed growth and invasion, improve soil quality…
Hydroseed vs. Sod vs. Grass Seed
If you’re starting a lawn from scratch, you’ve probably come across the three common methods for seeding: sod, grass seed, and hydroseed. In order to determine the best choice for your yard, you may want to ask yourself a few questions before you get started, and familiarize yourself with each of the processes so you can make the right choice…